The key to a cool glamping experience isn’t fighting heat, but engineering your environment by mastering basic thermodynamic principles.
- Heat management in a canvas tent relies on a three-pronged strategy: maximizing convective cooling (airflow), utilizing conductive cooling (direct contact), and minimizing radiative heat gain (sunlight).
- A portable power station and strategic fan placement are more effective and economical long-term than booking premium-priced, air-conditioned sites.
Recommendation: Instead of focusing on a single cooling gadget, design a holistic system that addresses airflow, personal hydration, and heat radiation before your trip.
You book it in the crisp chill of January: a beautiful, romantic canvas safari tent. The pictures promise adventure under the stars. But as summer approaches, a nagging anxiety sets in. Canvas, in the sweltering July sun, can feel less like a luxury retreat and more like a convection oven. The common advice—”open a window flap” or “bring a small fan”—feels woefully inadequate for true, restful sleep. These tips treat the symptom, not the system. They fail to address the fundamental physics at play.
The truth is, keeping a soft-walled structure cool without air conditioning is an engineering challenge. It requires a strategic approach that goes beyond basic camping hacks. The solution lies not in brute force, but in understanding and manipulating the three core modes of heat transfer: conduction, convection, and radiation. By treating your tent as a small ecosystem, you can systematically manage its thermal properties to create a comfortable microclimate, even as temperatures soar outside.
This guide will deconstruct the problem from a thermodynamic perspective. We will analyze how heat enters, how it can be blocked, and how it can be actively removed from your sleeping environment. We will explore the surprising thermal benefits of the canvas itself, the physics of evaporative cooling, and how to create a personalized comfort zone using a combination of smart site selection, equipment, and timing. Forget guesswork; this is your engineering manual for a cool, comfortable summer glamping experience.
To navigate this challenge effectively, we will break down the essential components of a successful cooling strategy. The following sections will guide you through everything from managing your tent’s airflow and internal environment to securing your gear and making the smartest booking decisions.
Summary: A Thermodynamic Approach to Staying Cool in a Glamping Tent
- Zippers and mesh: ensuring your luxury tent is actually mosquito-proof
- Ensuite vs shared block: is it really ‘glamping’ if you have to walk to the toilet?
- Canvas walls: why you should bring earplugs even to a 5-star glamping site?
- Locks and safes: how to keep valuables safe in a soft-walled structure?
- Shoulder season booking: why spring is superior to summer for tent stays?
- The Waterfront wave pool: cooling down when you can’t swim in the ocean
- How to prevent dehydration when hiking in 40°C desert heat?
- Are Australian Luxury Lodges Worth the $2,000 Nightly Rate?
Zippers and mesh: ensuring your luxury tent is actually mosquito-proof
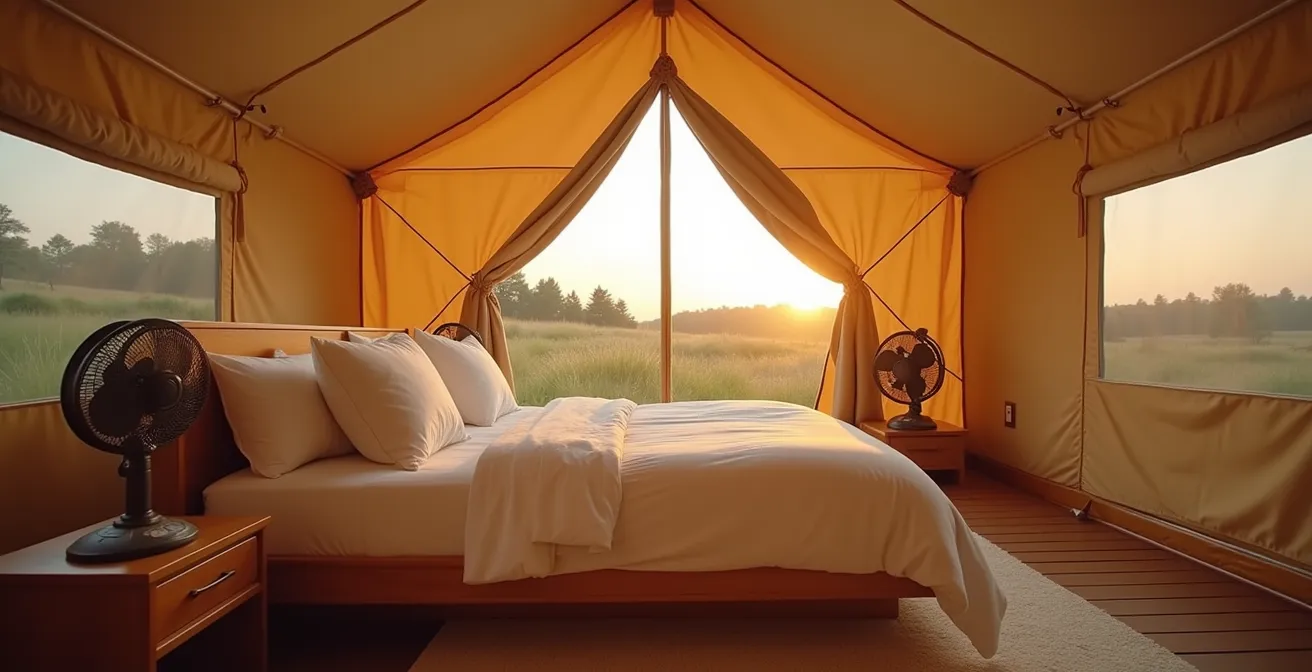
The first principle of passive cooling is mastering convection—the movement of air. To stay cool, you must continuously exchange the hot, stagnant air inside your tent with cooler, fresher air from outside. This presents an immediate conflict: open flaps invite airflow but also insects. Therefore, the quality of your tent’s mesh is not just a bug-proofing feature; it’s a critical component of your thermal regulation system. An ideal luxury tent features ultra-fine, “no-see-um” mesh that allows for maximum airflow while providing a complete barrier against pests. Ensure all windows and doors have dual-layer closures: a solid canvas flap for privacy and insulation, and a separate, fully zippable mesh layer.
Creating effective cross-ventilation is paramount. This involves opening mesh windows on opposite sides of the tent to allow breezes to pass through, carrying heat out with them. To amplify this effect, especially on still nights, position battery-powered fans at the mesh windows. One fan can be set to pull cool air in, while another on the opposite side pushes hot air out, creating a wind tunnel effect. This mechanical assistance to natural convection can dramatically lower the perceived temperature. However, be aware that even high-quality mesh can slightly impede airflow, a necessary trade-off for a bite-free night.
Beyond the tent’s built-in features, you can engineer an insect-free zone around your tent’s entrances. This allows you to leave canvas doors open longer in the evening to vent accumulated daytime heat. A semi-circle of citronella torches placed 6-8 feet from the entrance can create a formidable barrier. For a more robust solution, applying a perimeter spray treatment to the ground around the tent a couple of hours before sunset targets mosquitoes when they become most active, ensuring your convective cooling strategy isn’t sabotaged by pests.
Ultimately, the zippers and mesh are the gatekeepers of your comfort, balancing the critical need for airflow with the non-negotiable requirement of being insect-proof. Check them thoroughly before booking.
Ensuite vs shared block: is it really ‘glamping’ if you have to walk to the toilet?
While often viewed as a simple convenience, an ensuite bathroom is a powerful tool in your thermal management arsenal. Its value extends far beyond nighttime convenience; it offers a private, accessible facility for strategic conductive cooling. Conduction is heat transfer through direct contact. A cool or lukewarm shower is the most effective way to directly lower your core body temperature after a day in the sun. Having an ensuite means you can perform this critical pre-sleep ritual without a trek across a dark campsite.
The effectiveness of this technique is scientifically supported. An important case study on heat exposure demonstrates that a cooling shower before bed is a highly efficient method for lowering core temperature. The study reveals the optimal timing is 60-90 minutes before sleep, as this allows your body’s natural thermoregulation to engage, preparing you for rest. This pre-sleep cooling routine has been shown to significantly reduce the time it takes to fall asleep in hot conditions. A shared facility, often with queues or time limits, makes this precise timing difficult, if not impossible.
From an engineering perspective, a well-designed ensuite should also be thermally isolated from the main sleeping area. Look for designs with separate ventilation systems, light-colored roofing to reflect heat, and a physical air gap (like a covered breezeway) between the pod and the tent. This prevents the humidity and residual heat from the shower from migrating into your sleeping space. The ensuite becomes a dedicated “heat exchange” zone, a critical component in your personal cooling system.
Therefore, the question is not merely about the luxury of a private toilet. It’s about having on-demand access to a critical piece of thermal regulation equipment. When booking, view the ensuite not as a perk, but as a functional part of your climate control system.
Canvas walls: why you should bring earplugs even to a 5-star glamping site?
Canvas walls are the defining feature of a classic safari tent, but they are notoriously poor at blocking sound. The rustle of leaves, the chatter from a neighboring tent, or the distant hum of a generator can easily penetrate the fabric. This is why earplugs are a wise investment for light sleepers. However, from a thermodynamic standpoint, the very properties that make canvas a poor acoustic insulator make it a superior material for hot-weather shelter. Unlike synthetic materials like nylon or polyester which trap heat and moisture, cotton canvas “breathes”.
This “breathing” is due to the hygroscopic properties of cotton fibers. The material naturally absorbs ambient humidity and actively transports moisture and heat from the inside of the tent to the outside. According to a study on canvas material thermal properties, this process can create a significant temperature differential compared to synthetic tents. The evaporation of this moisture from the outer surface of the canvas creates a natural cooling effect, much like how sweating cools the human body. This makes the canvas itself an active part of your cooling system, not just a passive barrier.
Of course, you’ll likely supplement this natural process with fans or portable coolers, which brings us back to the noise issue. While you can’t control outside sounds, you can control the noise you introduce. When selecting a portable fan, noise level is a critical specification. For comfortable sleep, aim for a unit that operates at a low decibel level. The best modern portable cooling units operate at under 44-50 decibels, which is comparable to the sound of a quiet library. This ensures your solution for the heat doesn’t create a new problem with noise, allowing you to benefit from both the canvas’s thermal properties and your own engineered airflow.
In essence, the acoustic weakness of canvas is directly linked to its thermal strength. Embrace this trade-off: pack earplugs to manage the sound, and leverage the superior breathability of the fabric to stay cool.
Locks and safes: how to keep valuables safe in a soft-walled structure?
Engineering a cool microclimate in a tent often requires an investment in portable technology: high-capacity power stations, efficient fans, and maybe even a portable evaporative cooler. This equipment is not only valuable but also essential to your comfort. Securing these assets in a soft-walled structure requires a specific security protocol, as a simple padlock on a zipper is merely a deterrent, not a real defense. Your security strategy should focus on making the equipment difficult to see, access, and remove.
The first line of defense is discretion. Position expensive cooling equipment and power stations away from the tent’s entrance or mesh windows, out of the direct line of sight of passersby. If you are using solar panels to recharge during the day, use long extension cables to keep the valuable battery and power station securely inside the tent while the panels are outside. For the power station itself, the most critical item, a layered security approach is best. A heavy-duty steel cable lock, threaded through the station’s handle and secured to the tent’s internal steel frame D-rings, provides a solid anchor point.
The weight and value of your power station will dictate the level of security needed. Entry-level units are lightweight and can be secured with a simple cable, while heavier, more expensive models may warrant more robust solutions.
This table outlines a tiered approach to securing your power source, balancing the asset’s value against the security method’s cost and complexity.
| Power Station Category | Typical Value | Weight | Security Method |
|---|---|---|---|
| Entry Level (300Wh) | $200-300 | 7 lbs | Cable lock to tent frame |
| Mid-Range (1000Wh) | $400-600 | 29 lbs | Pacsafe mesh bag + ground anchor |
| High-End (2000Wh+) | $900-1500 | 30+ lbs | Locked vehicle storage during charging |
Finally, the most effective security measure is often site selection. Choose glamping sites that offer gated access, good lighting, and a 24-hour staff presence. This external layer of security significantly reduces the risk of opportunistic theft, allowing you to deploy your cooling system with peace of mind.
By implementing this security protocol, you protect the gear that is fundamental to your thermal comfort, ensuring your engineered cooling solution remains your own.
Shoulder season booking: why spring is superior to summer for tent stays?
The most elegant engineering solution is often the simplest one. Rather than battling peak summer heat, you can choose to avoid it altogether. Booking your glamping trip during the “shoulder seasons”—late spring or early autumn—is the most effective strategy for ensuring thermal comfort. During these periods, average daytime temperatures are often 10-15°F lower than in July or August, and nighttime temperatures provide a natural, cool sleeping environment without any special equipment.
From a financial perspective, this strategy is also highly logical. Glamping sites often charge a significant premium for peak summer dates. By opting for a shoulder season trip, the money you save on the booking premium can be re-invested into a high-quality, reusable DIY cooling kit. A one-time investment in a portable power station and fans can provide personalized climate control for years to come, across many different trips. This is a far more economical approach than repeatedly paying an inflated nightly rate for the “privilege” of staying during the hottest, most crowded time of year.
The following cost analysis illustrates the financial trade-offs between a peak summer trip and a shoulder season trip supplemented by a personal cooling kit.
As this analysis shows, investing in your own gear instead of paying a peak-season premium offers substantial long-term value.
| Option | Cost | Benefits | Drawbacks |
|---|---|---|---|
| Peak Summer Booking Premium | +$200/night x 7 nights = $1400 | Prime dates, full activities | Extreme heat, crowds |
| DIY Cooling Kit Investment | $400 power station + $100 fans + $50 accessories = $550 one-time | Reusable for years, personal comfort control | Initial investment, transport required |
| Shoulder Season Booking | Standard rates, save $1400 | Cooler temps (10-15°F lower), fewer crowds | Limited dates, some activities closed |
Moreover, a cooler environment allows the canvas to perform at its best. In the cool, dewy mornings of spring, you can physically see the tent’s “breathing” effect as condensation forms on the exterior, a visible sign of the fabric actively managing temperature and humidity. This natural performance is often overwhelmed by the brutal radiative heat of high summer.

Beyond comfort and cost, the shoulder seasons offer a more serene experience with fewer crowds, allowing you to more fully enjoy the peace and quiet that is a core part of the glamping promise.
The Waterfront wave pool: cooling down when you can’t swim in the ocean
While the title suggests a specific amenity, the underlying principle is universal: using water for cooling. This can be achieved through full immersion in a pool or by harnessing the power of phase change cooling, more commonly known as evaporative cooling. This physical process occurs when liquid water turns into vapor, absorbing a significant amount of heat energy from its surroundings in the process. It’s the same reason sweating cools your skin. You can engineer this effect to create a personal microclimate, even far from a pool.
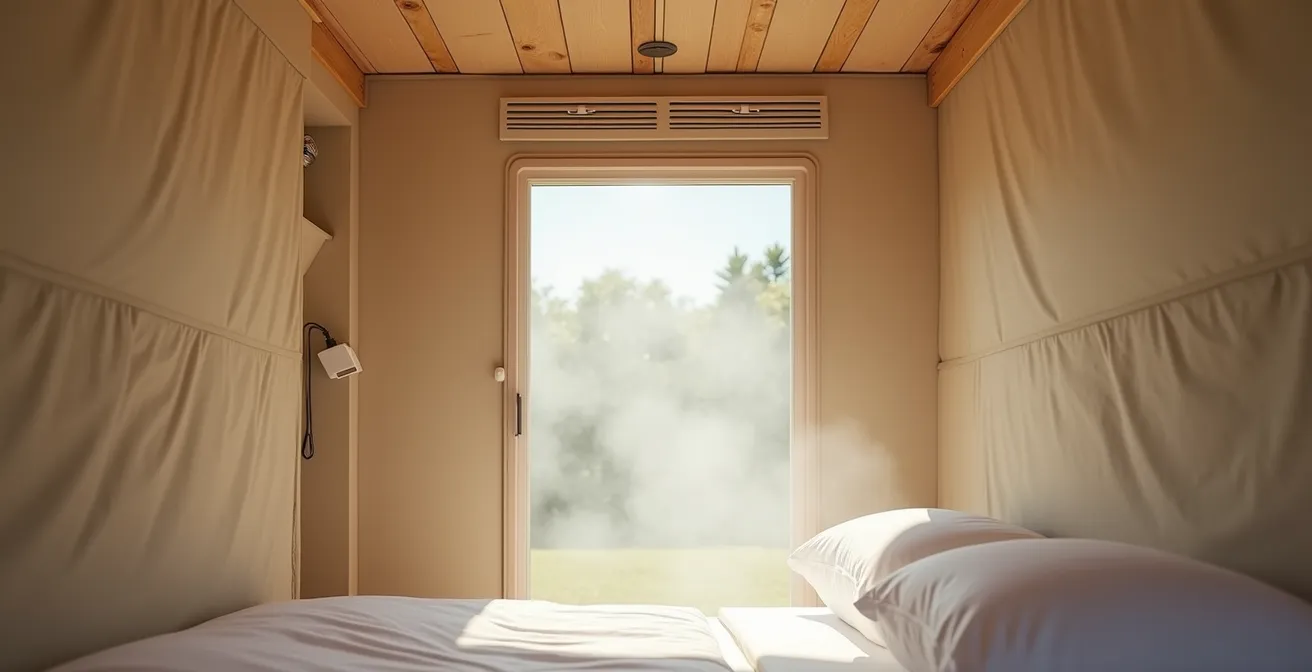
A highly effective method is to use a solar-powered misting system combined with a battery-operated fan. An in-depth look at evaporative cooling in camping environments shows this can reduce the perceived temperature in your immediate vicinity by 10-15°F. This technique is most efficient in dry climates with humidity below 50%, where the fine mist evaporates almost instantly on contact with your skin, drawing heat away rapidly. For a low-tech but surprisingly effective alternative, simply drape a damp cloth or sarong in front of a fan. This creates a “DIY swamp cooler,” and the effect can last for hours.
If your glamping site does offer water features, it’s crucial to evaluate their utility for genuine cooling, not just recreation. A crowded, warm pool may not provide the thermal relief you need. Before booking, inquire about specific details. Ask about the pool’s capacity relative to the number of tents, whether there are designated quiet hours, and if there is access to natural water features like a cool stream or creek. The availability of shaded, private outdoor showers can also be a significant asset for quick, conductive cooling sessions throughout the day.
Whether it’s a high-tech mister or a simple wet cloth, leveraging the physics of evaporation allows you to actively reduce the temperature in your personal space, giving you a zone of comfort even on the hottest days.
How to prevent dehydration when hiking in 40°C desert heat?
All the cooling strategies in the world are useless if your body’s internal cooling system—perspiration—fails. In hot weather, your body works tirelessly to regulate its temperature by sweating. This fluid loss must be aggressively replaced. In extreme heat, perspiration can cause you to lose 5 to 10 quarts of water per day. Staying hydrated is not just about comfort; it’s a critical safety requirement. Dehydration thickens your blood, forces your heart to work harder, and ultimately compromises your body’s ability to cool itself, leading to heat exhaustion or heatstroke.
The core principle is to drink proactively, not reactively. If you wait until you feel thirsty, you are already dehydrated. The Centers for Disease Control and Prevention provides clear, authoritative guidance on this. As stated in their official guidelines, it’s a crucial preventive measure.
During outdoor activities in a hot environment, everyone should drink two to four glasses (16-32 ounces) of cool fluids – preferably water – each hour
– Centers for Disease Control and Prevention, CDC Heat Illness Prevention Guidelines
This isn’t a suggestion; it’s a medical necessity in high temperatures. You must also replace the electrolytes (salts) lost through sweat. This can be done with electrolyte packets or tablets added to your water, or by snacking on salty foods like pretzels or nuts alongside your fluid intake.
To make this systematic, establish a dedicated hydration station within your tent. This puts hydration at the forefront of your mind and makes it easy to follow the protocol.
Action Plan: Glamping Hydration Station Setup
- Position a 5-gallon insulated water dispenser in the coolest, most shaded corner of your tent for easy access.
- Enhance water with natural flavor and minerals by adding slices of cucumber, mint, and lime to the dispenser.
- Establish an electrolyte corner next to the dispenser with pre-portioned electrolyte packets, salt tablets, and salty snacks.
- Set recurring hourly alarms on your phone or watch labeled “HYDRATE” during peak heat hours (e.g., 11 am – 5 pm) as a non-negotiable reminder.
- Store several backup water bottles in your cooler, keeping them frozen to act as thermal mass and serve as emergency cooling packs if needed.
This disciplined approach transforms hydration from a passive thought into an active, engineered process, safeguarding your health and enabling all other cooling strategies to work effectively.
Key takeaways
- Mastering airflow (convection) through cross-ventilation and fan placement is the most critical first step to cooling your tent.
- Water is your most powerful cooling tool; use it for both internal hydration and external evaporative/conductive cooling.
- The “breathing” property of cotton canvas is a key thermal advantage over synthetic tents; understand and leverage its ability to transport heat and moisture.
Are Australian Luxury Lodges Worth the $2,000 Nightly Rate?
The allure of a high-end luxury lodge is undeniable: guaranteed air conditioning, hotel-quality linens, and zero effort required. But this comfort comes at a steep price. From an engineering and economic standpoint, it’s worth asking if you are paying for true luxury or simply for a solution to a problem—heat—that you can solve yourself for a fraction of the cost. A $2000/night rate often subsidizes a massive, inefficient, grid-tied AC unit cooling a structure that may not be thermally optimized. By applying the thermodynamic principles discussed, you can often achieve a superior, personalized level of comfort in a standard glamping tent.
A DIY cooling setup, centered around a portable power station, gives you complete control over your environment. You choose the fan speed, the placement for optimal airflow, and the timing of your cooling efforts. This is a level of personalization that a one-size-fits-all hotel AC system cannot provide. The initial investment in gear is quickly offset by the savings from avoiding premium “AC-included” site fees. Furthermore, the technology is becoming increasingly affordable. An analysis of the market shows that power station costs have dropped to as low as $0.40/Wh in 2026 vs $1/Wh in 2024, making self-sufficiency more accessible than ever.
Let’s compare the costs and features of relying on a luxury site versus building your own reusable, high-performance cooling system over a five-night stay.
This comparison highlights the long-term value of investing in a personal, portable comfort system versus repeatedly paying for a built-in, temporary solution.
| Feature | Luxury Site ($200+/night) | DIY Setup ($100/night + gear) |
|---|---|---|
| Canvas Type | Double-walled safari tents | Standard canvas + reflective tarp |
| Power Supply | Built-in electrical | Portable power station ($400) |
| Cooling | AC unit included | Battery fans + evaporative cooler ($150) |
| Bedding | Hotel-quality linens | Percale sheets ($80) |
| Total 5-Night Cost | $1000+ | $500 + $630 gear (reusable) |
The satisfaction of engineering your own comfort is a reward in itself. It transforms you from a passive consumer of luxury into an active, knowledgeable participant in your environment.
Ultimately, the choice is yours. You can pay a premium for convenience, or you can invest in knowledge and equipment, empowering yourself to create a comfortable glamping experience anywhere, on your own terms. Your first step is to design the cooling system that best fits your needs and budget.