In summary:
- Australia’s world-class safety standards, especially in skydiving, are a core feature, not a bug.
- Securing sought-after experiences like the Sydney Bridge Climb requires strategic booking, not just luck.
- Choosing the right location (like Cairns for bungee or Ningaloo for whale sharks) dramatically impacts your experience.
- Real adventure requires preparation, from specific fitness tests for remote hikes to a plan for not losing your camera.
- Maximizing your “experience ROI” means knowing when to spend a little extra for a much bigger payoff.
Australia. The name itself conjures images of sun-drenched landscapes and heart-pounding adventure. For any thrill-seeker, it’s the ultimate playground. You’ve seen the epic photos: smiling faces freefalling over turquoise water, climbers silhouetted against the Sydney Opera House at sunset. But turning that inspiration into reality can feel overwhelming. Most travel guides just give you a generic list of activities, leaving you to untangle the web of bookings, safety concerns, and the crucial question: “Is this *really* worth it?”
This is where the real adventure begins—not on the trail or in the air, but in the planning. The secret to an unforgettable trip isn’t just picking an activity; it’s mastering the logistics behind it. What if the key wasn’t just knowing *what* to do, but understanding *how* to do it smarter? This guide is your inside track, your co-pilot. We’re moving beyond the simple bucket list to answer the critical questions that turn a good trip into a legendary one.
We’ll dive deep into the ‘why’ behind Australia’s elite safety standards, give you a concrete strategy for nabbing a spot on the world’s most famous bridge climb, and help you settle the debate between iconic locations. We’ll also cover the practical stuff: the real fitness you need for a multi-day trek and how to make sure your action camera makes it home with you. Get ready to plan your adventure with the confidence of a seasoned pro.
This article breaks down the essential intel you need to conquer Australia’s best adrenaline experiences. Below is your roadmap to adventuring smarter, safer, and with maximum impact.
Summary: Your Guide to Australia’s Best Thrills
- Why Australian safety regulations for skydiving are among the strictest globally?
- How to secure a spot for the Sydney Bridge Climb during peak season?
- Cairns or Gold Coast: which offers the better bungee jumping experience?
- The fitness level required to complete the 4-day Thorsborne Trail
- Action camera mounts: preventing gear loss during high-speed activities
- Sampler vs Summit: is the full climb worth the extra $100?
- How to correct a skid on corrugated dirt roads without flipping the car?
- Swimming with Whale Sharks: Is Ningaloo Reef Better Than the Great Barrier?
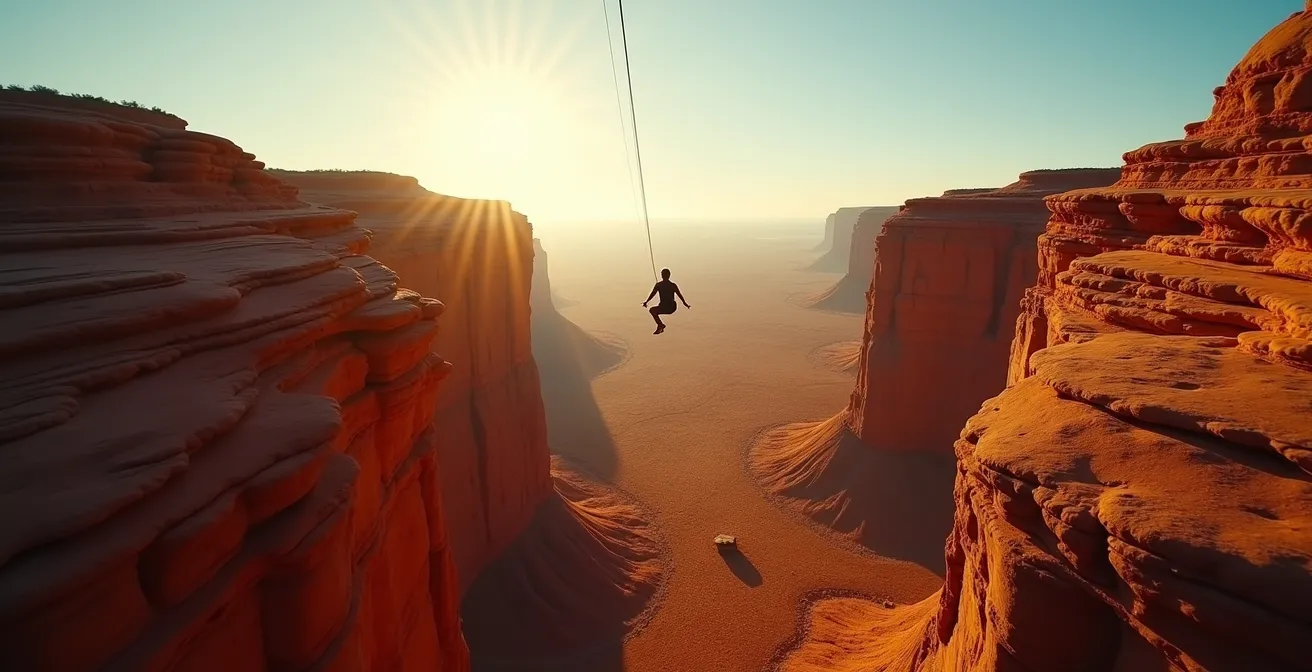
Why Australian safety regulations for skydiving are among the strictest globally?
When you’re jumping out of a plane at 15,000 feet, “safe” isn’t just a buzzword—it’s everything. In Australia, safety is a deeply ingrained system, governed by the Australian Parachute Federation (APF). This isn’t just about ticking boxes; it’s a culture of professionalism that sets the global standard. The reason for this rigor is a combination of a proactive governing body, a litigious-aware society, and a genuine commitment to protecting both the public and the sport’s reputation.
This commitment translates into tangible, non-negotiable rules that far exceed standards in other parts of the world. For instance, the medical requirements for instructors are incredibly stringent. The APF mandates that all Tandem Masters hold a CASA Class 2 medical certificate, the same level required for private pilots. This ensures your instructor has the proven physical and mental capacity to handle the immense responsibility of getting you to the ground safely, a requirement that was solidified after inconsistencies were found with standard GP certifications.
This dedication to expertise is also reflected in experience requirements. While international standards vary, top-tier Australian operators push the limits. For example, some leading drop zones demand their tandem instructors have double the industry standard with 1,000 jumps minimum before they can even be considered. This isn’t just a number; it represents thousands of hours in the air, mastering every possible scenario. So when you choose to skydive in Australia, you’re not just buying a thrill; you’re investing in a system built on calculated risk and uncompromising professionalism.
How to secure a spot for the Sydney Bridge Climb during peak season?
Climbing the Sydney Harbour Bridge at twilight, with the sun setting over the Opera House, is one of Australia’s most iconic moments. It’s also one of the most in-demand. During peak season (like Christmas, New Year’s, or school holidays), the most popular slots are often sold out months in advance. Simply showing up and hoping for the best is a recipe for disappointment. The key isn’t luck; it’s a smart booking strategy.
First, you need to understand the demand. Twilight climbs are the first to go, followed by daytime slots. To make an informed decision on what to target, understanding the different options is key. The availability, group size, and overall experience vary significantly depending on the time of day you choose.
This overview shows why the Twilight climb is so competitive. To beat the crowds, you need a solid plan.
| Climb Time | Demand Level | Booking Lead Time | Best For |
|---|---|---|---|
| Dawn | Low-Medium | 1 week | Photography, smaller groups |
| Day | Medium | Few days | Most departure options |
| Twilight | Very High | 3+ weeks | Sunset views, most popular |
| Night | Low | Few days | City lights, unique experience |
With this knowledge, you can now build a strategy. Instead of just trying to book a Twilight climb and failing, you can approach it like a pro. The following checklist gives you a tactical edge, from booking alternatives to catching last-minute openings. Following these steps will dramatically increase your chances of standing on top of the ‘Coathanger’ when it matters most.
Action Plan: Securing Your Peak Season Bridge Climb
- Book Early: Target a date 3 months in advance, especially for Christmas/New Year’s, as soon as slots open online.
- Target Alternatives: Aim for the Dawn climb. It offers spectacular light for photos and is often less competitive than the sold-out Twilight slots.
- Set Cancellation Alerts: Use a calendar reminder to check the booking site 24-48 hours before your desired date to snag spots from corporate block cancellations.
- Call Directly: In the final days, phone the booking office in the mid-afternoon (AEST). You might get real-time updates on availability that aren’t yet online.
- Be Flexible: Consider an early morning weekday climb. They typically have better availability and can sometimes be more affordable.
Cairns or Gold Coast: which offers the better bungee jumping experience?
The exhilarating freefall of a bungee jump is a must-do for many adventurers, but in Australia, your choice is simpler than you might think. While you may hear about options on the Gold Coast, the reality is there is only one place to go. As the team at Britz Australia highlights, the nation’s premier experience is found in Tropical North Queensland.
Australia’s one and only bungy experience, the Skypark Cairns by AJ Hackett towers 50 metres above a natural lagoon and provides stunning views across the Cairns and Far North Queensland region.
– Britz Australia, 14 Adrenaline Rushes to Experience in Australia
This makes the decision less about “which city?” and more about “what kind of experience?” The AJ Hackett Skypark in Cairns offers a fundamentally different vibe from the temporary, event-based structures that occasionally pop up in places like the Gold Coast. The choice boils down to a rainforest immersion versus an urban spectacle.
To help you decide if the Cairns experience is right for you, let’s break down the key differences.
| Feature | Cairns (AJ Hackett) | Gold Coast |
|---|---|---|
| Setting | Rainforest lagoon | Theme park structure |
| Height | 50 meters | Varies by location |
| Unique Features | 16 jump styles, water touch | Urban skyline backdrop |
| Atmosphere | Tropical, natural | Entertainment precinct |
| Value Add | Only bungy in Australia | Multiple attractions nearby |
The verdict is clear. If you’re seeking an authentic, world-renowned bungee jump surrounded by nature, Cairns is the undeniable winner. The purpose-built tower, the stunning rainforest setting, and the sheer variety of jump styles (from classic swallow dives to backward falls) create a complete adventure experience. While a jump on the Gold Coast offers a city view, the Cairns location provides an iconic, globally recognized thrill that is synonymous with bungee jumping itself.
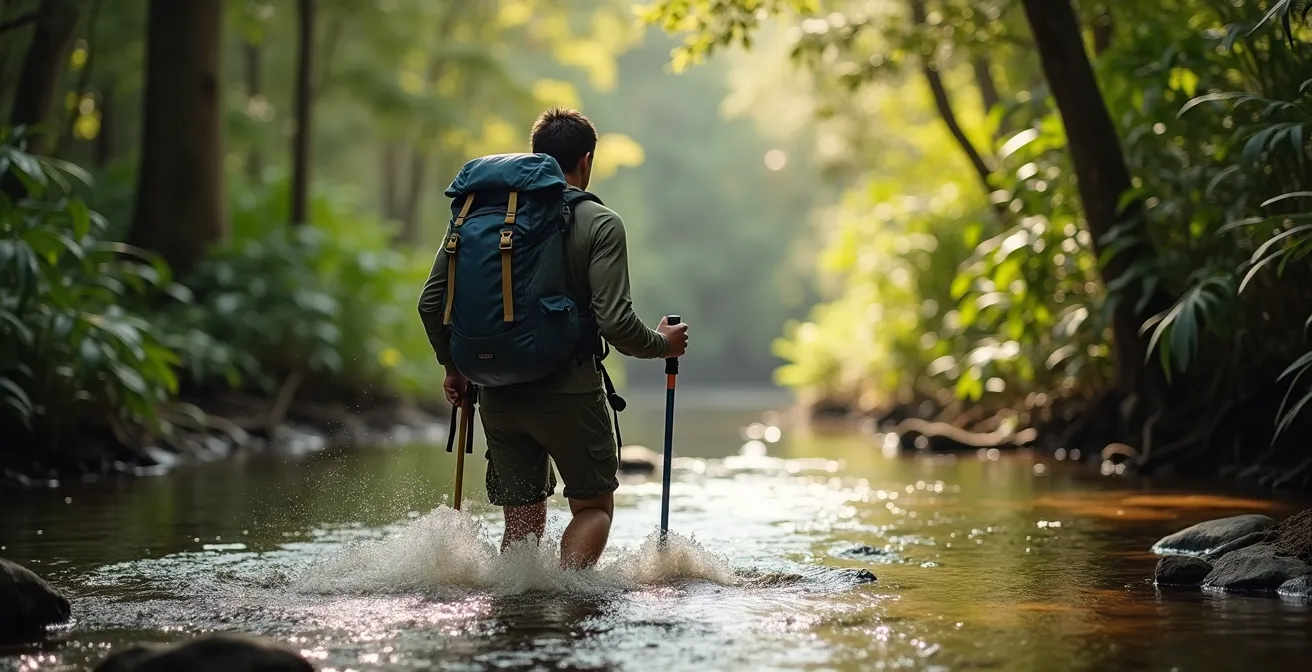
The fitness level required to complete the 4-day Thorsborne Trail
The Thorsborne Trail on Hinchinbrook Island isn’t a walk in the park—it’s a full-blown expedition. This 32-kilometer coastal track is one of Australia’s most spectacular and challenging multi-day hikes. Its “Grade 5” difficulty rating means it’s suitable only for highly experienced hikers with strong navigation skills. You’ll be carrying a pack weighing 15-20kg, navigating unmarked sections, scrambling over rocks, and wading through multiple creek and river crossings. This is a true test of self-sufficiency and physical endurance.
So, what does “fit enough” really mean for the Thorsborne? It’s more than just being able to walk long distances. It’s about functional strength, balance, and mental fortitude. You need to be comfortable on your feet for 6-8 hours a day on rugged, unstable terrain, all while carrying everything you need to survive. The humidity can be draining, and the creek crossings can be chest-deep after rain, demanding confidence in the water.
Underestimating the physical demands is the most common mistake people make. To avoid being airlifted out, you must honestly assess your fitness. The best way to do this is to simulate the trail’s challenges *before* you go. Don’t just hope for the best; prove to yourself that you’re ready. This pre-hike fitness protocol is your non-negotiable training plan. If you can’t comfortably complete these tests, you are not ready for the Thorsborne Trail.
Your Pre-Hike Fitness Test Protocol
- The Pack & Stairs Test: Complete a 1-hour walk wearing a 15kg backpack. This must include at least 20 continuous minutes of climbing stairs to simulate steep ascents.
- The Uneven Terrain Test: Hike for 10km on a rough, uneven trail while carrying your fully loaded pack (15-20kg) to test your balance and endurance.
- The Creek Crossing Drill: Practice walking through local creeks or rivers to get comfortable with moving in water and managing your pack’s weight.
- The Mental Resilience Builder: Undertake progressively longer solo walks to build the mental stamina required for navigating and problem-solving alone.
- The Gear Shakedown: Before the main event, complete a 2-day, 1-night overnight hike using all the gear you intend to take on the Thorsborne. This is the final test for both you and your equipment.
Key takeaways
- Safety is Systemic: Australia’s top-tier adventure operators don’t just follow rules; their entire system is built on a culture of safety and professionalism.
- Strategy Trumps Spontaneity: For high-demand attractions, a smart booking strategy and a bit of flexibility will always beat a last-minute hope.
- The Experience is the Destination: The best choice isn’t always the most famous city, but the location that offers the most authentic and immersive version of the adventure you’re seeking.
Sampler vs Summit: is the full climb worth the extra $100?
When booking the Sydney Bridge Climb, you’ll face a key decision: the shorter, cheaper ‘Sampler’ or the full ‘Summit’ climb. With a price difference often around $100, it’s tempting to opt for the more budget-friendly choice. But this is a classic case of “you get what you pay for.” The decision comes down to your personal ‘Experience Return on Investment’ (ROI). Are you here for a quick photo, or are you here for the definitive, once-in-a-lifetime memory?
The Sampler climb is a great introduction. It takes you halfway up the bridge’s inner arch, giving you a fantastic view of the harbour. It’s shorter, less physically demanding, and still a genuine thrill. However, it’s just a taste of the full experience. The Summit climb is the main event. It takes you along the upper arch, right to the 134-meter peak, offering unparalleled 360-degree panoramic views of the entire city and beyond.
To make the right choice for you, let’s lay out the facts in a direct comparison.
| Feature | Sampler | Summit |
|---|---|---|
| Height reached | Halfway point, inner arch | 134m, outer arch peak |
| Duration | 1.5 hours | 3 hours |
| Steps | ~500 | 1,332 |
| View | Harbor views | 360-degree panorama |
| Photo ops | Limited | Multiple summit shots |
Looking at the data, the differences are stark. The Summit climb is twice as long, involves more than double the steps, and delivers a completely different level of visual payoff. So, is it worth the extra $100? As one travel expert puts it, the answer for most international visitors is a resounding yes.
For a once-in-a-lifetime trip, the answer is almost always yes. The Summit gives you the iconic 360-degree view and the ‘King of the World’ photo op.
– Bridge Climb Review, Sydney Expert Travel Guide
The verdict: If this is your one big trip to Australia, stretch the budget for the Summit. The extra cost is marginal compared to the vastly superior experience and the lifelong memory of standing on top of the world. The Sampler is a fine choice if you’re on a very tight budget or short on time, but the Summit is the true prize.
How to correct a skid on corrugated dirt roads without flipping the car?
Driving in the Australian outback is an adventure in itself, but it comes with unique challenges. One of the most notorious is corrugated roads—the endless, bone-jarring, washboard-like ripples in the dirt. At the wrong speed, these corrugations can cause your vehicle to lose traction and enter a dangerous skid. Knowing how to react—and what *not* to do—is a critical survival skill. Panicking and slamming on the brakes is the single worst response and the fastest way to flip your vehicle.
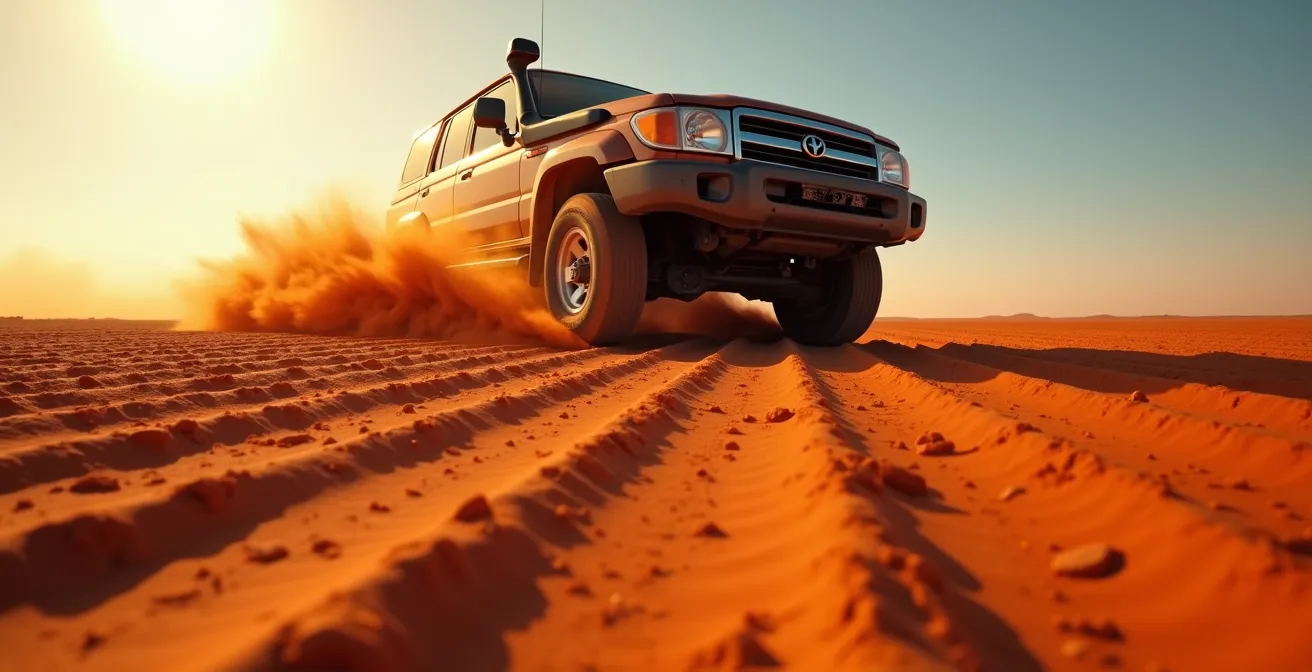
The key to maintaining control is to be smooth and deliberate. Your goal is to regain traction, not to stop abruptly. The moment you feel the vehicle start to slide, your instincts will scream “BRAKE!” You have to fight that urge. The correct response involves gentle inputs to the accelerator and steering wheel. It’s about looking where you want to go and guiding the car there, not fighting the skid.
There are two main types of skids: front-wheel (understeer), where the car wants to go straight even when you’re turning, and rear-wheel (oversteer), where the back of the car slides out. The correction for each is slightly different, but the core principle is the same: stay calm and be gentle. Before you even hit the dirt, prevention is your best tool. Lowering your tire pressure increases the tire’s footprint on the ground, significantly improving grip on loose surfaces.
If you find yourself in a skid, follow these steps exactly. Practice them in your mind so they become second nature.
Emergency Skid Correction Procedure
- Ease Off the Accelerator: As soon as you feel the skid, gently and smoothly lift your foot off the accelerator. Do NOT slam on the brakes.
- Look and Steer: Keep your eyes focused on your intended path, not the obstacle you’re trying to avoid. Steer smoothly in that direction.
- Correct for Understeer (Front Skid): If the car isn’t turning, ease off the throttle completely and wait for the front wheels to regain grip before reapplying gentle power.
- Correct for Oversteer (Rear Skid): If the rear of the car slides out, apply gentle counter-steering (steer into the skid) with a small amount of steady throttle to help stabilize the vehicle.
- Prevention First: Before driving on long corrugated sections, reduce your tire pressure by 20-30% to improve traction and smooth out the ride.
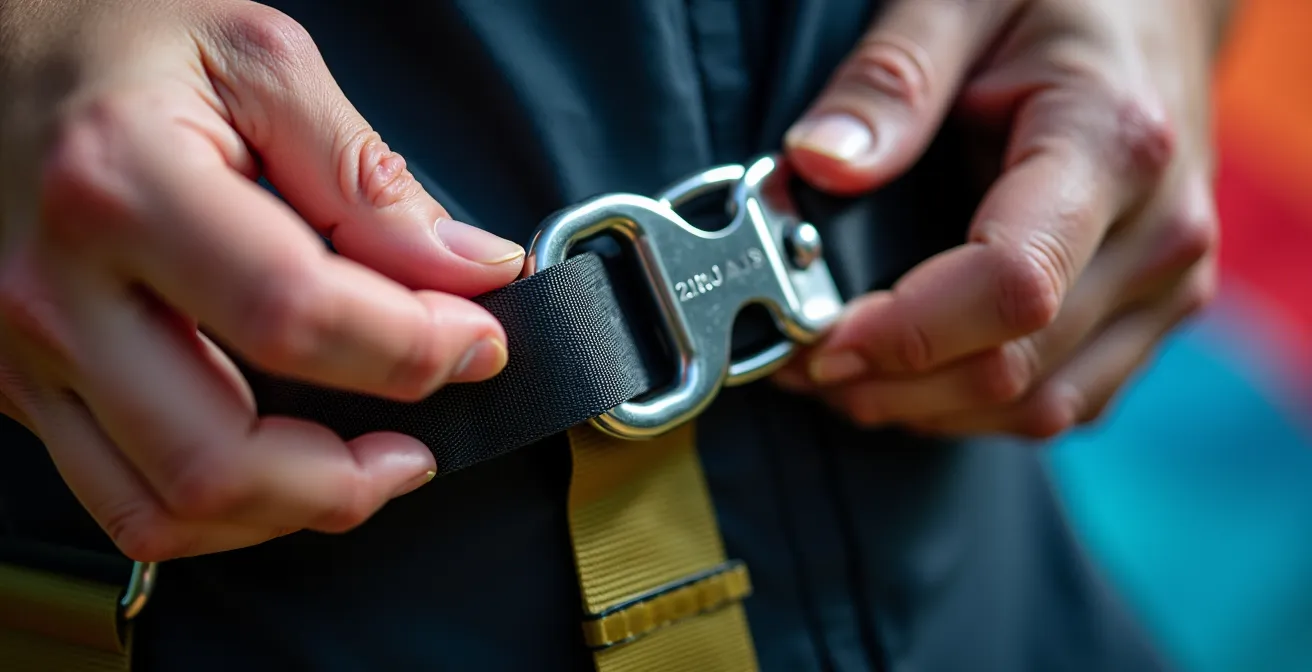
Action camera mounts: preventing gear loss during high-speed activities
You’ve just had the most incredible experience of your life, but when you go to check the footage, your camera is gone. It’s a gut-wrenching moment that’s all too common for adventurers. During high-speed activities like skydiving, mountain biking, or bungee jumping, the forces acting on your gear are immense. A standard, flimsy mount is simply not up to the task. Preventing gear loss isn’t about luck; it’s about creating redundancy and choosing the right tool for the job.
First, it’s crucial to know the rules. For activities like skydiving, safety is paramount, and that extends to camera equipment. Due to the risks of a camera getting snagged during parachute deployment, Australian regulations require at least 100 skydives minimum before a licensed jumper is even allowed to wear a helmet camera. For tandem students, helmet mounts are strictly prohibited. This is why wrist or chest mounts are the only approved options, as they pose less of an entanglement risk.
Beyond regulations, the secret to keeping your gear secure is the principle of a secondary tether. Never trust a single point of failure. No matter how secure a mount seems, always create a backup. A simple, high-strength fishing line or a thin steel tether, connecting your camera case to a secure part of your gear (like a backpack strap or harness), is the cheapest and most effective insurance policy you can have. Finally, match your primary mount to the specific demands of the activity.
Here is a quick guide to selecting the right mount for your adventure:
- Skydiving: Use a secure wrist or chest mount. Helmet mounts are forbidden for tandem passengers and low-experience jumpers.
- Mountain Biking: Combine a chest harness for a stable point-of-view shot with a handlebar mount to capture dynamic angles of the trail and suspension working.
- Bungee Jumping: A selfie stick can work, but it must be tethered with a secondary safety line attached securely to your harness.
- Water Activities: Always use a floaty handle or case attachment. Applying a drop of anti-fog solution to the inside of the lens port is also essential.
- The Golden Rule: For any activity, create a backup by using high-strength fishing line or a dedicated tether to create a secondary attachment point.
Swimming with Whale Sharks: Is Ningaloo Reef Better Than the Great Barrier?
Swimming alongside the largest fish in the ocean is a profound, humbling experience that sits at the top of many bucket lists. In Australia, two world-famous locations offer this possibility: the Great Barrier Reef and Ningaloo Reef. While the Great Barrier Reef (GBR) is more famous globally, when it comes to reliable whale shark encounters, there is a clear and undisputed champion: Ningaloo Reef in Western Australia.
The difference comes down to one word: reliability. On the Great Barrier Reef, seeing a whale shark is a rare, opportunistic event. It’s a matter of pure luck. At Ningaloo, however, the encounters are a predictable, seasonal phenomenon. The reef’s unique geography and the annual coral spawning create a rich feeding ground that attracts hundreds of whale sharks every year. Tour operators at Ningaloo are so confident that many offer a “no-sighting” guarantee, offering a free repeat tour if you don’t see a shark.
The experience is also fundamentally different, as shown by a direct comparison of the two reefs. Ningaloo’s tours are highly regulated adventure expeditions, while GBR tourism is more diversified.
| Factor | Ningaloo Reef | Great Barrier Reef |
|---|---|---|
| Whale Shark Reliability | Very High (Mar-Aug) | Rare/Opportunistic |
| Regulation | Strict codes, spotter planes | Standard reef protocols |
| Setting | Rugged outback-ocean | Tropical resort-based |
| Accessibility | Fringing reef from shore | Boat access required |
| Overall Experience | Adventure-focused | Diverse marine tourism |
Ningaloo offers a world-class, dedicated whale shark experience. Spotter planes are used to locate the sharks, ensuring minimal impact and maximum viewing time for swimmers. The regulations are incredibly strict, dictating approach distances and interaction times to protect the animals. This creates an experience that feels wild and adventurous, set against the rugged backdrop where the outback meets the ocean. In contrast, the GBR is a massive ecosystem with a much broader tourism focus, where whale sharks are a lucky bonus, not the main event.
Now that you’re armed with the insider knowledge to plan your trip like a pro, the only thing left to do is choose your adventure. Australia’s wild heart is calling. Go answer it.